Curriculum links:
- Chemistry – Chemical reactions and change in materials
- Biology – Several animals use slime to survive like worms, frogs and snails (slime is what helps a snail move and climb up steep surfaces).
Learning objectives:
- How to make Slime!
- Investigate how different materials mix and interact.
Materials:
- Borax (a cleaning product)
- White glue
- Water
- Food colouring/glitter
- Ziploc bags
- Measuring cups
- Measuring spoons
Safety:
- Be careful with the mixture as the food colouring can stain hands and also skin. It’s not dangerous but can take a while to wash off!
- Wear an apron or old clothes.
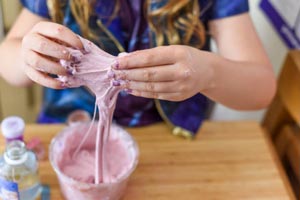
Instructions:
- Take a cup of water and add to it 1 tablespoon of borax (approx. 4% solution). Stir until completely dissolved.
- Make a ½ water ½ white glue solution. Take 1/4 cup of each and mix thoroughly.
- In a Ziploc bag, add equal parts of the borax solution to equal parts of the glue solution. ½ cup of each will make a cup of slime. Add a couple drops of food colouring (and glitter if you want!) and seal the bag before kneading the mixture.
- Dig in and have fun! Remember to wash your hands after playing. Keep your slime in the sealed bag in the refrigerator when not playing with it to keep it longer. Unfortunately, it may eventually dry out or grow mould. Just throw it out and start again!
How it works:
Borax (sodium borate) acts as the crosslinking agent or “connector” for the glue. Once the glue molecules join to form even larger molecules, called polymers, you get a thickened gel very similar to slime. If you have access to a chemical supply house, try a 4% solution of polyvinyl alcohol instead of the glue for a less rubbery polymer and one that is transparent showing off the colour of the slime better.